


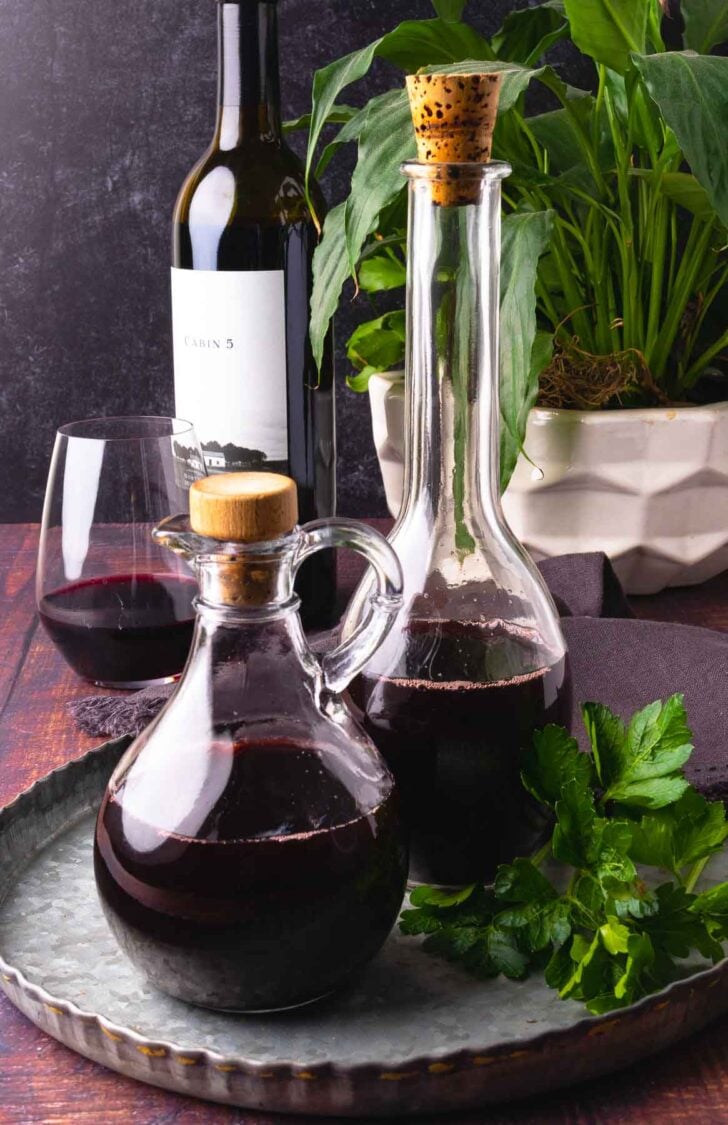
Making homemade Red Wine Vinegar is easy and much more flavorful than buying it at the store. Turn leftover wine into a delicious vinegar perfect for salads, side dishes, and recipes that need an extra splash of flavor!

The Little Kitchen Experiment That Stuck

I’ve got several different kinds of vinegar in my pantry, and I use most of them quite often. There’s the workhorse, Apple Cider Vinegar, and coming in a close second is Red Wine Vinegar. Both have so many uses, which means I’m constantly restocking my supply.
I recently discovered I could make my own red wine vinegar at home from leftover wine. It may seem crazy to say “leftover wine” like that really happens, but it does. With some good red wine and a little patience, you can have a delicious, flavorful vinegar in a few weeks.
Homemade Red Wine Vinegar has deep flavors that are more complex than anything you can buy at the store. You will love the beautiful extra something that it adds to your recipes.
Enjoy!

Donya’s Tips & Things To Know
- Use glass. Vinegar is acidic, so I use glass for both fermenting and storing it.
- Keep the cloth secure. You want airflow, but you do not want fruit flies or dust getting into the jar.
- Don’t rush the taste test. If it still tastes noticeably like wine, let it keep working.
- Save the mother. Keep it with a little finished vinegar and use it to start another batch.
- Keep homemade vinegar out of canning recipes. Its acidity is not tested, so use commercially produced vinegar labeled 5% acidity when a tested canning or pickling recipe calls for it.

Two Ways To Make Red Wine Vinegar
You can make red wine vinegar as a small batch or keep a continuous supply going. I like having both options because sometimes you just want to use up leftover wine, and sometimes you want a jar working in the background so there is always homemade vinegar ready to use.
Method 1: Small Batch Red Wine Vinegar
This is the best place to start if you are making homemade vinegar for the first time.
- Pour the wine into a clean, wide-mouth glass jar. A half to three-quarters full bottle of red wine is plenty for a first batch. Leave room at the top so air can circulate.
- Add a live vinegar culture. Use raw, unpasteurized vinegar that contains the mother or add a piece of an established vinegar mother.
- Cover the jar with cheesecloth or clean cloth. Secure it with a rubber band. The vinegar needs oxygen while it develops, so do not use a tight lid yet.
- Set it out of direct sunlight. I keep mine toward the back of the kitchen counter where it can sit undisturbed at room temperature.
- Start checking after a few weeks. Smell it first, then taste. When the wine flavor has given way to a clean, tart vinegar flavor, it is ready.
- Bottle it. Strain if you prefer a clearer vinegar, transfer it to a clean glass bottle or jar, and cap it tightly.
The timing can vary from batch to batch, so this is one of those kitchen projects where your nose and your taste buds are better guides than the calendar.
Method 2: Keep A Continuous Supply Going
Once you have a healthy mother and some finished live vinegar, you can keep the same jar going instead of starting over each time.
- Leave some finished vinegar and the mother in the jar. That becomes the starter for the next batch.
- Add more red wine. Pour it in gently, leaving space at the top of the jar for airflow.
- Cover with cloth again. Keep the jar out of direct sunlight and let the vinegar continue to develop.
- Taste before using. As the fresh wine turns tart and vinegary, you can draw off what you need.
- Keep feeding the batch. Each time you use some vinegar, leave enough live vinegar and mother behind to help the next addition of wine get started.
This method is especially handy if you use red wine vinegar often. Once the jar is established, it becomes less of a recipe and more of a pantry staple you keep going.
If Your Vinegar Looks A Little Strange, Read This First
Homemade vinegar changes while it ferments, and some of those changes can look odd if you have never made it before.
- A jelly-like layer is usually a good sign. That is the mother of vinegar. It may float, sink, or form in layers.
- Cloudiness is normal. Homemade vinegar is not filtered and pasteurized the way many commercial vinegars are.
- If it still smells mostly like wine, give it more time. Fermentation does not run on an exact kitchen timer.
- Fuzzy mold is not normal. If you see fuzzy growth in unusual colors or the mixture smells rotten or unpleasant, discard it and start again.

How To Store Homemade Red Wine Vinegar
Choose the Right Container: I use a glass bottle with a cork or screw top. Glass is preferred as it doesn’t interact with the vinegar, preserving its taste and quality.
Keep It in a Cool, Dark Place: Store the red wine vinegar in a cool, dark cupboard away from direct sunlight and heat.
Seal It Properly: Make sure the bottle is sealed tightly to prevent air from entering, which can cause the vinegar to spoil or lose its potency.
Recipes To Make With Red Wine Vinegar


Red Wine Vinegar Questions, Answered
The mother is a soft, jelly-like mass of acetic acid bacteria and cellulose that can form while vinegar ferments. It may float, sink, or form in layers, and you can save it to help start another batch.
It is ready when it smells clean and vinegary, tastes pleasantly tart, and no longer tastes noticeably like wine. Start tasting after a few weeks and let flavor, not the calendar, be your guide.
Wine can sometimes turn to vinegar naturally, but adding a live vinegar culture makes the process more reliable. I recommend starting with raw, unpasteurized vinegar that contains the mother or with a piece of an existing vinegar mother.
No. Homemade vinegar can vary in acidity. For home-canning and tested preservation recipes, use commercially produced vinegar labeled 5% acidity.
If you make a batch, leave a comment and let me know how it turns out. I always love hearing what is happening in your kitchen.
Ingredients
- 1 bottle red wine
- 1 cup raw vinegar
Instructions
Small Batch
- Use ½ or ¾ full bottle of red wine. Place the wine in a large mouth glass jar or bottle. Cover the top with cheesecloth and secure it with a rubber band. Leave it in a warm place for 2 weeks. That's it. The natural oxidation process will turn the wine into vinegar. Taste then store in a sealed or corked bottle.
Constant Supply
- Add 1 cup of mother and an entire bottle (750ml) of red wine to a large glass container. Cover and place out of direct sunlight. Over a 2 to 3 week period, you'll see a "skin" form over the top of the mixture. The skin will eventually sink to the bottom (about 2 weeks) and you'll have vinegar. As you use the vinegar, you can add more wine to the supply you've been making. Taste then store in a sealed or corked bottle.
Nutrition


This post may contain afflicate links.

The Effortless Host eBook
Hosting doesn’t have to mean stress, long to-do lists, or staying stuck in the kitchen. The Effortless Host is your shortcut to pulling off beautiful gatherings with confidence and ease.

The Thanksgiving Countdown: 7 Days to a Beautiful & Delicious Feast
GET THIS FREE GUIDE: To help plan out your menu, when to buy your ingredients, and what prep work you can do in advance.

What is Raw vinegar? Like non pasteurized apple cider vinegar?
Under the “constant supply” subhead, what is one cup of “mother”?
What is meant by”mother” is the living cultures in any vinegar that you have purchased like Braggs Raw (unpasteurized, so it does not kill the live cultures that are beneficial for the gut, as iris full of lactic acid bacteria) Apple Cider Vinegar (ACV). You can also make your own ACV with some apple peels, cores and scraps from a home made, from scratch apple pie!
What is meant by”mother” is the living cultures in any vinegar that you have purchased like Braggs Raw (unpasteurized, so it does not kill the live cultures that are beneficial for the gut, as it is full of lactic acid bacteria) Apple Cider Vinegar (ACV). You can also make your own ACV with some apple peels, cores and scraps from a home made, from scratch apple pie!
soooo Good!
Thank, Lori!
~Donya