

5-Star Reader Comment
“Entire family loved it! I made it just exactly as printed.
Twee
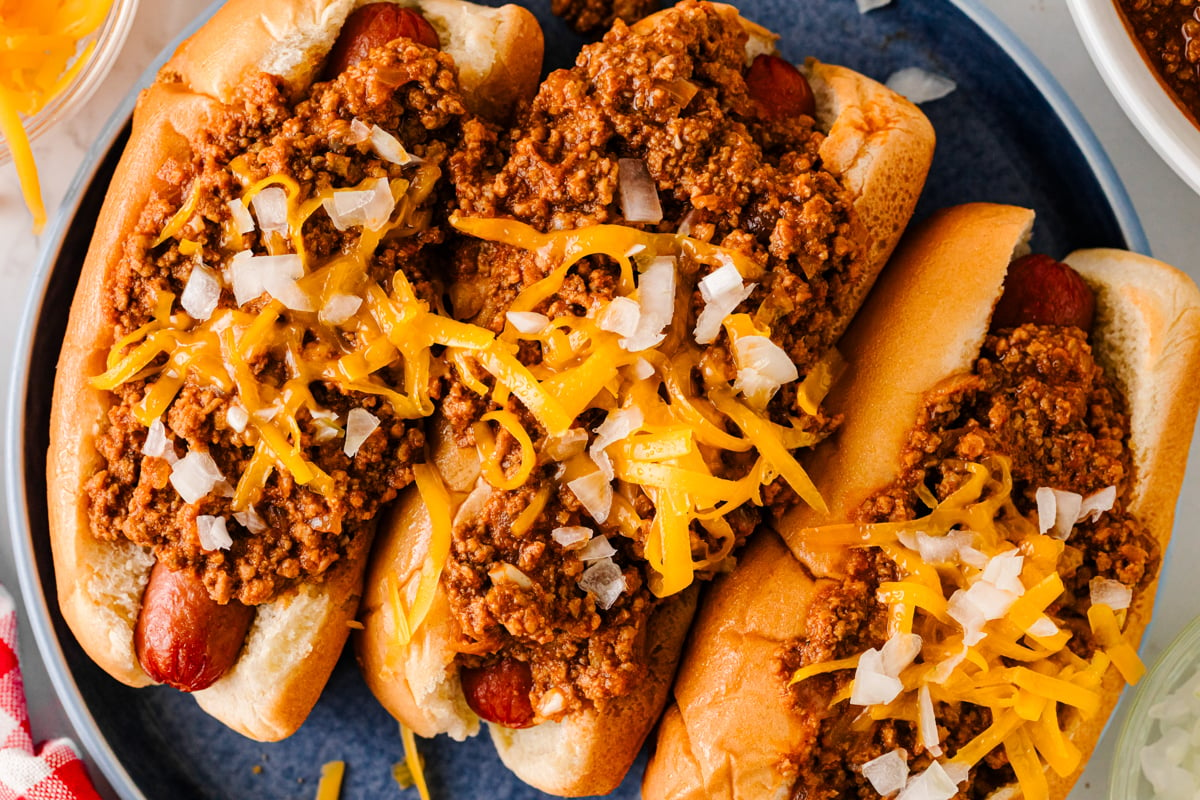
We topped the dogs with onions and mustard – and everyone from grandkids to grandparents raves about it.
Thank you!”
When Someone Asks for It by Name, You Know You Have a Winner

When my youngest son Hunter graduated from high school, I organized a cookout for his drumline and their parents. A few days before, I got a text from one of the kids asking if I could please make my hot dog chili. My heart melted a little.
That is the kind of recipe this is. The one people remember and ask for by name. Rich, meaty, just the right texture, and deeply flavorful from a long list of spices that come together into something truly special.
XO,

Hot Dog Chili vs. Regular Chili: What Is the Difference?
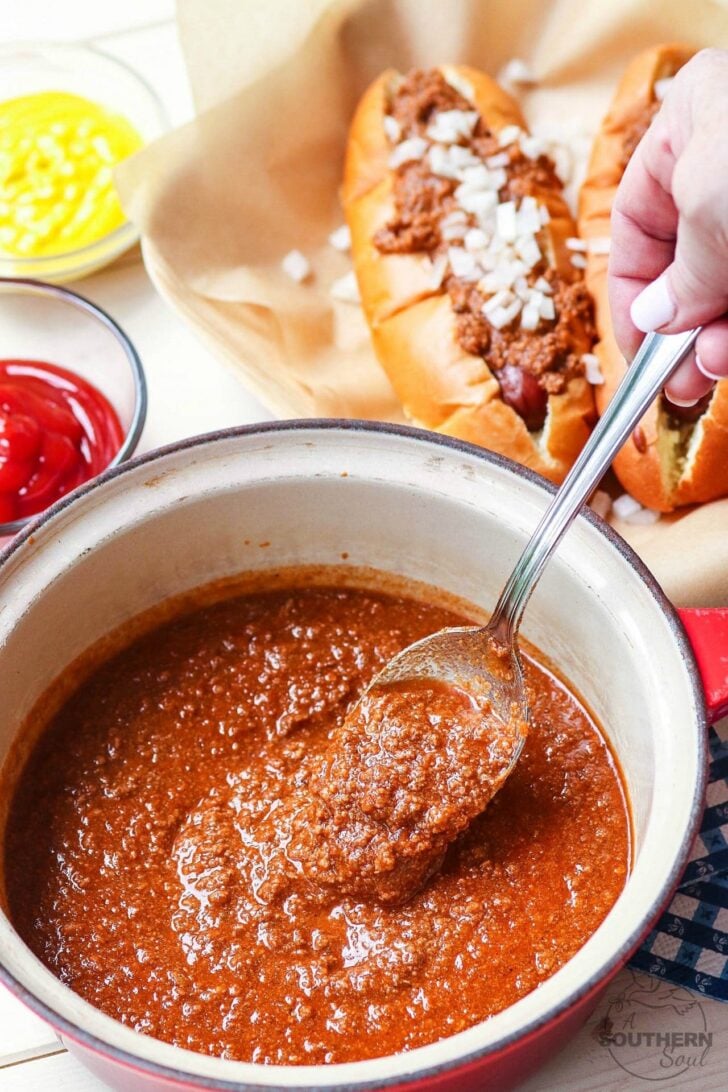
Hot dog chili is a sauce, not a stew. No beans, finer texture, and built to sit on top of a hot dog without sliding off. Regular chili, like my Award-Winning Chili, is chunky and meant to be eaten with a spoon. These are two very different things.
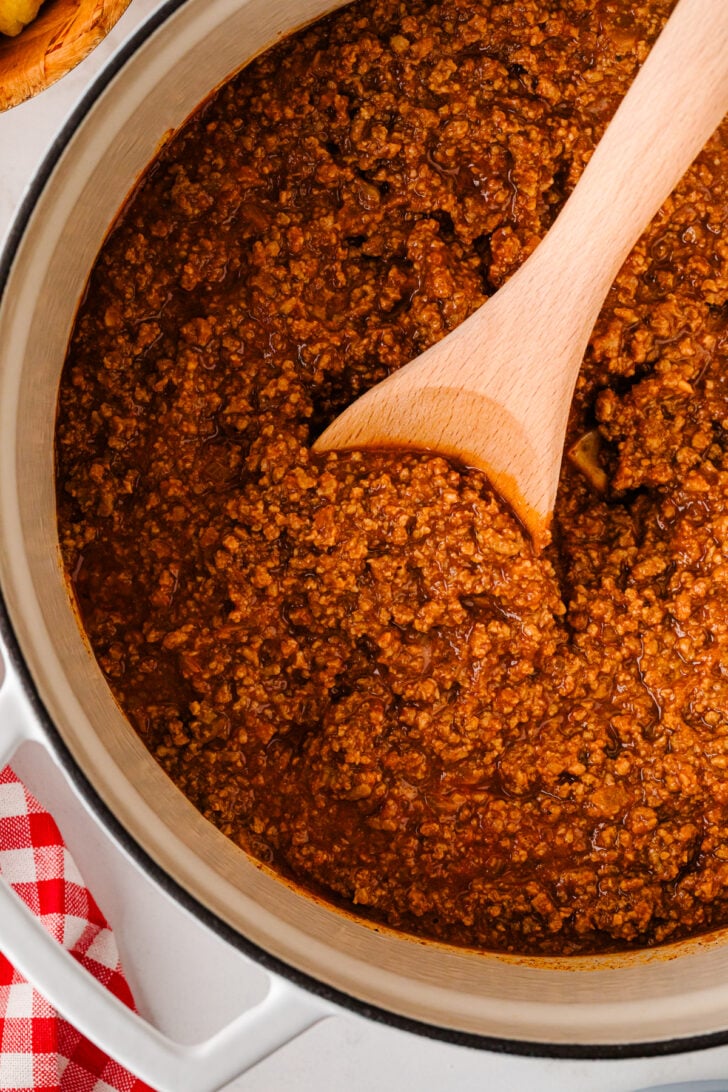
The blending step at the end is what gets you that smooth, saucy texture. An immersion blender right in the pot is the easiest way. A regular blender works too — just go in small batches and hold the lid down. A food processor is another option. Prefer to skip blending? A potato masher gives you a chunkier but equally delicious result.
What Meat Works Best
| Meat | Best Option | Flavor Profile | Best For |
|---|---|---|---|
| Ground Beef | 90/10 lean | Rich, savory, classic | Traditional hot dog chili flavor |
| Ground Turkey | 93/7 lean | Mild, lighter | A leaner, everyday version |
| Ground Pork | 80/20 | Rich, slightly sweet | Bold, full-flavored sauce |
Donya’s Best Tips for Hot Dog Chili
Break the meat down fine from the start. As the ground beef browns, break it into the smallest pieces possible. The finer the texture going in, the better the final sauce comes out after blending.
Cook the tomato paste first. Adding tomato paste before the liquid ingredients and letting it cook for two to three minutes deepens the flavor significantly. Do not skip this step.
Simmer low and slow. Thirty minutes of gentle simmering is what thickens the sauce and melds the spices together. Rushing this step gives you a thin, flat-tasting chili.
Blend while it is still hot. An immersion blender right in the pot is the easiest method. If using a regular blender, work in small batches and hold the lid down.
Make it ahead. This chili tastes even better the next day. Make it the night before, refrigerate it, and reheat gently when you are ready to serve.
What Goes In It and Why It Matters
- Ground beef is the base. I use lean ground beef so the sauce is rich but not greasy. Ground turkey or pork both work as substitutes.
- Onion and garlic build the savory foundation. They go in right after the beef drains so they soften and absorb all the flavor left in the pan.
- Tomato paste, tomato sauce, and ketchup create layers of tomato flavor. The paste adds depth, the sauce adds body, and the ketchup adds a sweet tang that is essential to the classic hot dog chili flavor.
- Honey and brown sugar add a subtle sweetness that balances the heat and acidity. Do not skip either one.
- Worcestershire sauce and yellow mustard add savory depth and a slight bite that makes this sauce taste complex without being complicated.
- Chili powder, cumin, celery salt, and black pepper are the spices that give this recipe its signature flavor. Celery salt in particular is what makes this taste like the real thing.
How To Make It
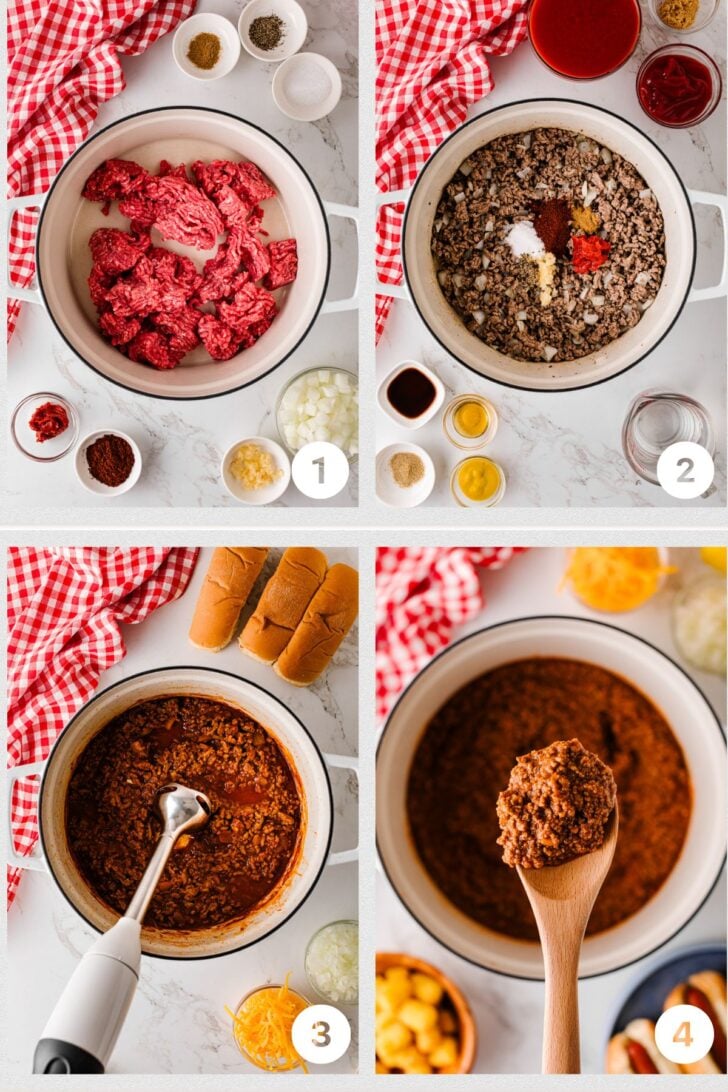
- Brown the ground beef in a heavy pot or Dutch oven, breaking it into fine pieces as it cooks. Drain the fat, add onions, and stir. Add garlic, tomato paste, and the dry spices and cook for two to three minutes.
- Stir in the Worcestershire sauce, mustard, tomato sauce, honey, ketchup, and water. Bring to a boil, then reduce to a low simmer.
- Cook uncovered for about 30 minutes, stirring occasionally, until the sauce has thickened. Remove from heat and let it cool for 15 minutes. Use an immersion blender to blend until the meat is broken down into a fine, saucy texture.
- Serve immediately or store in an airtight container in the fridge. Full details are in the recipe card below.
Build the Perfect Chili Dog
The sauce is only half of it. Here is how to build a chili dog worth remembering:
- The dog: Grill it over direct heat for char marks and snap. A good quality all-beef hot dog makes a real difference.
- The bun: Lightly butter and toast the bun on the grill, air fryer or in a skillet. A toasted bun holds up to the chili without getting soggy.
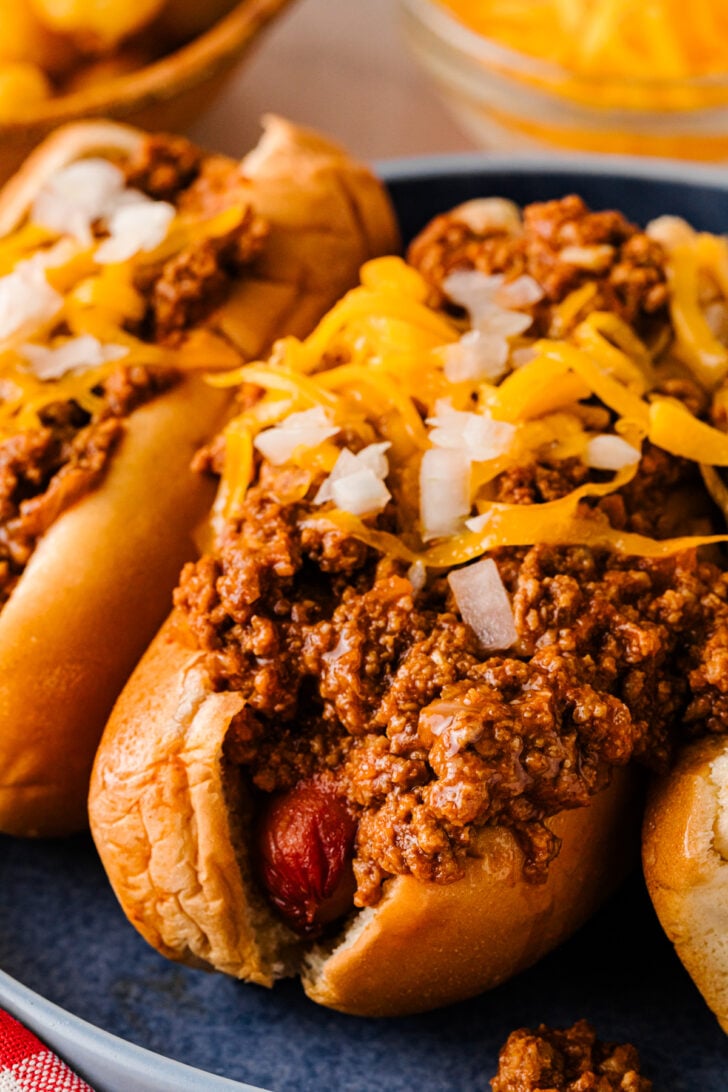
- The toppings: Start with a line of yellow mustard, then spoon the chili generously from end to end. Add finely chopped white onion and finish with shredded cheddar.
- The extras: Pickle relish, candied jalapeños, and creamy coleslaw are all outstanding additions. Set them out and let everyone build their own.

Make-Ahead and Freezer Tips
Make it the night before and refrigerate in an airtight container. The flavors deepen overnight and it reheats beautifully on the stovetop or in a slow cooker.
For a crowd: Double the batch, make it two days ahead, and keep it warm in a slow cooker set to low. Set up a topping bar and let everyone serve themselves.
Freeze for up to three months in a freezer-safe bag or container. Thaw overnight in the fridge and reheat gently on the stovetop with a splash of water if needed.
More From My Kitchen, Made for Your Table


Equipment
Ingredients
- 1 ½ pounds ground beef
- 1 cup onion – chopped
- 2 cloves garlic – minced
- 1 tablespoon tomato paste
- 2 teaspoons chili powder
- 1 teaspoon salt
- ½ teaspoon pepper
- ½ teaspoon cumin
- ½ teaspoon celery salt
- 1 tablespoon brown sugar
- 1 teaspoon Worcestershire sauce
- 1 tablespoon yellow mustard
- 1 8 oz can tomato sauce
- 1 tablespoon honey
- ⅓ cup ketchup
- 1 cup water
Instructions
- In a dutch oven or heavy bottom pot, brown ground beef. When the meat is no longer pink, drain excess fat and add onions to pot, stir. Add in garlic, tomato paste, chili powder, salt, pepper and cumin and cook for 2-3 minutes. Add celery salt, sugar, Worcestershire sauce, mustard, tomato sauce, honey and ketchup, stir. Add in water. Bring chili up to a boil then reduce to simmer. Cook for approximately 30 minutes sauce has thickened. Remove from heat and let cool 15 minutes.
- Using an immersion blender, carefully blend chili until meat chunks are broken down. *You can also use a regular blender, making sure to blend in small batches to avoid getting burned.
- When ready to serve, heat chili either on stove or in a slow cooker. Can be stored in refrigerator for 3 days or frozen up to 3 months.
Nutrition

Beyond the Hot Dog: More Ways to Use This Chili
This sauce is too good to stop at hot dogs. Here is how else I use it:
• Spooned over crispy French fries or tater tots for chili cheese fries
• Loaded onto a baked potato with sour cream and cheddar
• Stirred into mac and cheese for a chili mac the kids will love
• Spooned over nachos with shredded cheese and pickled jalapeños
• Used as a burger topping instead of plain ketchup
Questions You Might Have
No. Hot dog chili is a sauce, not a stew. No beans, finer texture, and built to be a topping rather than a standalone dish. If you want a hearty chili with beans, I have that recipe too.
Absolutely. Add a pinch of cayenne pepper or a dash of your favorite hot sauce when you stir in the spices. Taste as you go and build up the heat to where you like it.
Yes. Brown the beef first, then add everything to the slow cooker and cook on low for four to six hours. Blend before serving.
wn hot dogs!
Transfer the finished chili to a slow cooker set to warm or low. It holds beautifully for two to three hours and stays the perfect consistency for spooning over hot dogs.
If you tried this Hot Dog Chili Sauce Recipe or any other recipe, please leave a star rating and let me know how it went in the comments below. Thanks!



The Effortless Host eBook
Hosting doesn’t have to mean stress, long to-do lists, or staying stuck in the kitchen. The Effortless Host is your shortcut to pulling off beautiful gatherings with confidence and ease.

5 Days of Cozy Fall Southern Recipes
GET THIS FREE GUIDE: My best easy Southern recipes for a relaxing fall season.

I use a recipe almost identical to yours. I substitute the sugar with brown monkfruit sweetener, and I substitute beef broth instead of water for extra richness and flavor! Great recipe!
Thank you for sharing those swaps!
XO, Donya
I finally made it today, followed all your directions on how to do it in my crockpot. It tastes very good, but I notice it is a little watery. I wonder why?
So glad you gave it a try! A little extra liquid in the crockpot is totally normal since it holds in moisture as it cooks. Just remove the lid for the last 20 to 30 minutes and let it cook uncovered — that will thicken it right up!
XO, Donya
good sauce. made a second time already and this time added some cayenne to it for a little bite. .
I got compliments from everyone how good it is.
Love that you made it your own with a little cayenne — that bite takes it to the next level! And compliments all around? That is the best feeling. Thank you for coming back to let me know. That means everything!
XO, Donya
I haven’t made this chili recipe yet but I want to. I enter my email address and press save but your system doesn’t send it to my email address I have tried it on every new email you send but it will not go to my email
When you get the emails, click on the photo and you will get all of the recipes. Also, you can search for any recipe on the site by clicking on the “recipes” tab at the top of the site.
XO,
~Donya
Terry
This is my go to recipe for hot dog chili. I have used it since the first time I came across it. Delicious!!!
That is the highest compliment — a go-to recipe that never gets replaced! Thank you so much for sticking with it and for taking the time to say so. It means everything to know it has a permanent spot in your kitchen!
XO, Donya
Have been making this sauce for about three months now. Everyone who tries it wants the recipe it’s awesome. Thank you. It can be tweeked in so many ways , depending on the guests being served.
That makes my heart so happy — three months in and already sharing it with everyone around you. That is exactly what this sauce is meant for. And you are so right, it is one of those recipes that plays well with whatever crowd you are feeding. I love that idea for hot dog chili too. Thank you for the kind words and for passing it along!
XO, Donya